Block making in itself is an art that constantly evolves with the changes in the printing or the textile industry. With the development of textile printing the basic structure of the block changed considerably. Earlier blocks were very simple wooden structures without any handle, and were simply pressed on the fabric with hand or a wooden mallet. The result was not very even. Later on blocks with handles were developed for the ease of printing. Another system of creating an impression on fabric was the clamping the fabric, where in the cloth was pressed between two identical blocks. Later on iron hammers were used to apply pressure on the block, while the huge blocks could be pulled up and down by a pulley.
There is considerable diversity in the materials used for making blocks and in the techniques of block printing. Many factors decide what kind of block should be made for a particular situation. The most basic factor is the kind of wood. Sagwaan is considered best for the purpose and thus remains the most preferred wood. It is found in abundance in Gujarat and Madhya Pradesh. Perhaps the fact that this wood is easily available locally makes it popular with local block makers. Locally it is known as Saag or Sagi (botanically called Tectona Grandis). The colour of the sap wood is
golden yellow, which slowly changes colour, from light to dark brown and then to almost black with age. One of the most important characteristics is the natural oil contained in the wood that helps in its preservation. Due to lack of fibres, it is easier to carve very finely.10 The wood needs to be seasoned for the long life of the block. Thoroughly air dried wood is called seasoned wood.
Wood needs to be seasoned before being used for any kind of constructive purpose. Even the well seasoned wood has proportion of water, which can be removed by hot air drying. Seasoning is quicker when wood is kept in water for a long time and then dried. In villages often people keep the wood in village ponds or lakes for months for the same purpose.
The next stage is developing the design of the block. The design of the block is created on a piece of paper. The wood is then mechanically cut to the required size of the block. Once the wood is ready to use, then the design or the pattern is transferred to the wood. This is called “likhai”, drawing the design on the block.
Carving the block
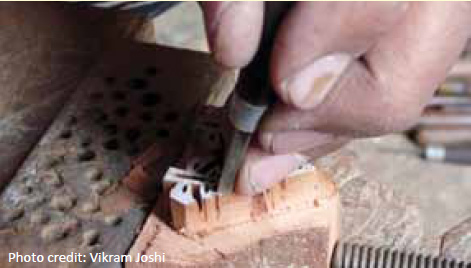
The next stage is the carving of the design. That requires an understanding of the basic system of blocks. When one wants to print a single colour design then only one block is required to print this design. This could be the Rekh –the outline block, or the “Jaal” a kind of block, which has a geometrical, floral or lattice work. The key outline block (from the Hindi word “rekha” which means line) defines the form of pattern. Normally Rekh in considered the “key block” which gets printed first in order to give ‘clue’ to other block to fit in. In some cases Rekh is split into two blocks in order to print two colours. This kind of block is known as ‘chirai’ (splitting) block.
To achieve a second, third or fourth colours many blocks are needed. The second colour blocks are “datta” or “Daatla” and the third block is called the “Gad”. Usually these blocks are much thicker than the first block. Here we need to visualize a red flower, for example which has green leaves, brown twigs and a black outline. Thus the first block that we will print is the black outline and it will be the finest, as it defines the space. Then comes for example the red flower, this is being printed between the outline of the black and this will still be a fine block, but much thicker than
the outline. Basically one needs to imagine step by step painting of colours inside the pattern created by an outline of a pencil.
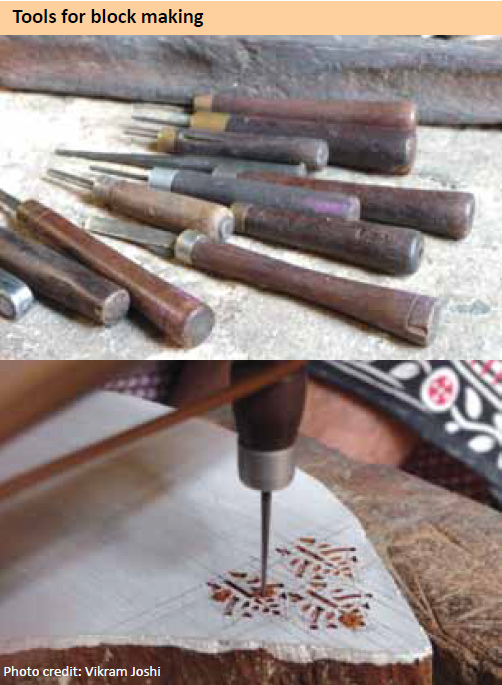
The saw is used for the basic cutting of a block of wood, which is required for making the chaapa-the block. The drill is used for making the holes in the blocks, while the chisel carves out the minutest details with the help of the hammer. Later on, the woodworker uses a file to smoothen the block. Vice and pincers are used for holding the small pieces in position. A thin layer of whitening chalk is mixed with gum and water and then it is applied on the smooth surface of the wood to take the impression of the design. The design which is drawn on a tracing paper is made in
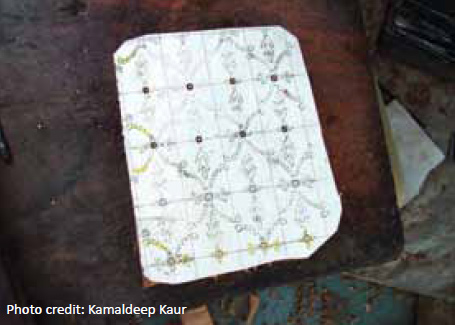
as many colours as are required to be printed. Thus each colour represents a different block –the rekh, the gad, and the data. This design is further transferred to the wood for carving. Tiny iron chisels of various sizes are used for carving the design.
Once the engraver starts to make the block, he might realize that the inner layer of the wood is not so well seasoned or dried after being seasoned in water. Thus the blocks are immersed in local oil for a couple of days for further seasoning
Block making
1. Tracing the design on paper from an old design
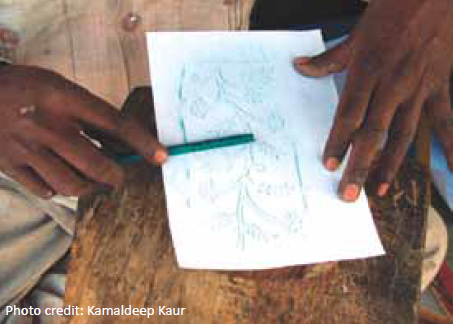
2. A design being traced on paper, to be printed on the wood later

3. Design traced on to the wood for carving
4. The carving of the block

5. Detail of carving
6. A block already half carved
A block fully carved, now all the extra wood needs to
be cut from the sides.
Sizes of blocks
The sizes of the blocks can vary considerably depending upon the design, but at the same time there are certain specific sizes which are found more commonly.
For the main block which fills the entire surface of the fabric, the usual size is 6”x6”, one does find blocks as big as 7”x12”also. The borders blocks are usually 6” long, but the width can vary considerably depending upon the design.It starts from half an inch and one can find border blocks as wide as 4 inches, there are adequate options.
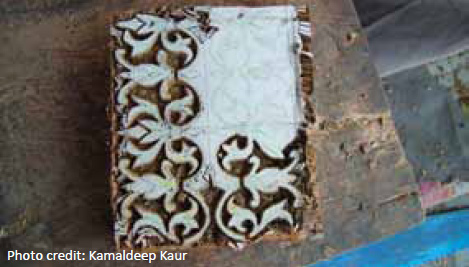
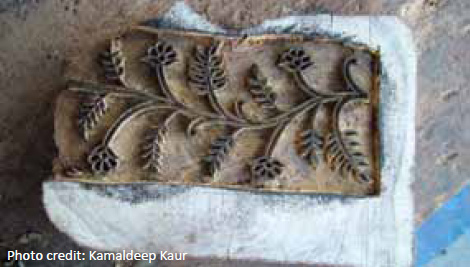
Different sizes and styles in blocks
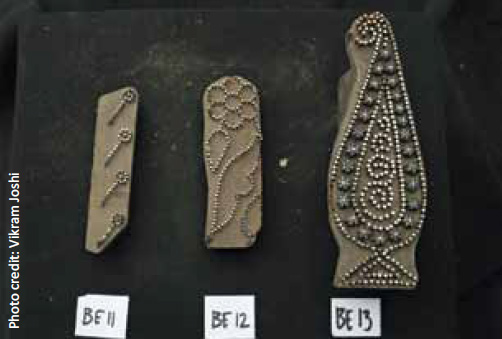
Wooden blocks inserted with metal to create pattern
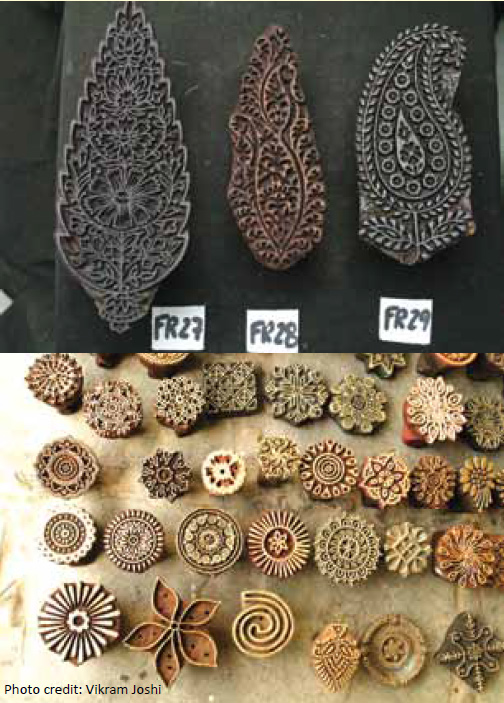
A variety of blocks in various sizes

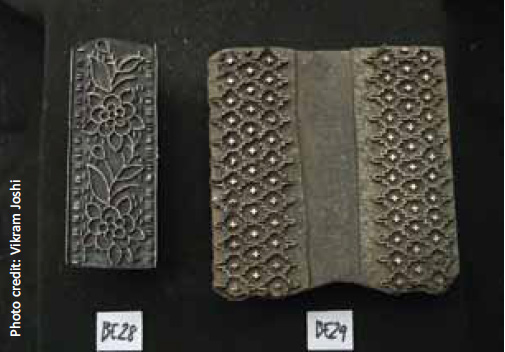
Matching blocks to print in combinations: The second and the broader block in the picture actually has the possibility of having another block printed between the two identical patterns on both sides.
In a buta or buti the sizes can vary considerably. From 2” till 8” long are easily available and thus the width also changes according to the length and the shape of the design.
Buta and buti blocks in different sizes
Leave a Reply